Friday, December 17, 2010

The Guest Room

The floor in this room was pink 9 x 9 linoleum tiles. At one time there was some water damage by the windows, I think that may have been why there was two layers of tiles. Under the oink tiles I found linoleum sheet installed.  To try and match the rest of the upstairs I'm replacing with an Armstrong "classic black" vintage style 12 x 12 linoleum tile, it's a pretty good match to the original that's throughout the rest of the house. 


I've removed the old caulk around the windows and re-caulked.
old caulk


re-caulked


plaster  repair


the linoleum roll found under the pink tiles.

Concrete floor.


concrete ground down to prep for tile installation.
leveled the concrete floor.

carl installing the tiles


finished installation, five days I'll strip the factory film and seal with wax.


Tuesday, December 7, 2010

The Kitchen Dilemma

The Kitchen will be the last room to be remodeled,  in my current home I waited until I finished everything else. The reason is that the entire first floor will have to be done prior to the kitchen being installed, there's no breaks in the flooring.  In a kitchen I like to see under neath the cabinets. The floor I have in my kitchen now is made by "Roppe" it's a black raised rubber flooring.  At first I thought I would have rubber in this kitchen, then install linoleum throughout the rest of the downstairs. But both my brothers got me to see the flow of the space, and how important it was not to disrupt that. The floor plan is so nice and open, it flows. I made a little 3d model of the space:
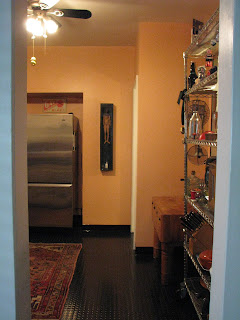
This is a top view of a model I did in Alias trying to figure out how I might squeeze all my kitchen stuff in. The downstairs layout is basically a large closet, a small bathroom, a good size living space, and small dinning space, and a galley kitchen. On the east wall I was trying see how much room I would have if I brought my metro rack and butcher block.

I think the rack measures 80" x 45", the butcher block is about 25" out from the wall. The top view shows them scaled 3D.  I'm working it out somewhat at least on one wall, but downsizing in the kitchen, you'd think I was a hoarder.


In this picture you can see how much the butcher block stands out.


 Knowing what I have in my kitchen makes it so difficult to design the townhouse galley kitchen. This will be the smallest kitchen I have ever had in any of my houses. I've been collecting images, and working it out in 3D so that the space will be maximized but have a minimal clean look to it. I've seen other units that the openness of the floor plan is lost because of poorly designed kitchens. I don't want to make this mistake, but will have to consult the experts. I'm lost..............


A 3D model if I decide to bring the rack and butcher block.  They both are use full they store so much.  More to come on this subject.


This is the E15 piece my brother John suggested I select. It's really the perfect piece for this space. On the wall that I have the rack and block shown. If I decide to go very minimal, only the essentials it will be this piece. I know the appliances will  be downsized to 24" wide instead of the standard 30". Perhaps single sink even though I have a brand new in box double stainless steel sink. There's always Craigslist.

Sunday, December 5, 2010

Moving Upstairs

Attacking the upstairs. Where to start is the question?. I'm one who works in a way where many things are being done at once, so that everything also comes together at once. While this is soaking in chemical remover, this is being plastered. While I'm dismantling the kitchen I'm also removing the baseboard molding. In hind sight I should not have started in the basement, especially after the basement floor accident. The basement would be last if I had to do it over. Regardless, I'm upstairs and I'm ready to go. First, I felt like this place is a virgin Mies pallet to work from. I also thought every thing was so precious, and how could I replace any thing. The more I looked at the kitchen cabinets the more they depressed me. I knew I had to get rid of them.
The kitchen is a galley style kitchen 12' x 6.5' which is going to be a challenge for me. My current kitchen is large and I have lots of kitchen stuff. This will be the last room I'll deal with. I'm going to consult many people on this.


The Mies table and pull down cook top have been removed,  I've put it them away until I can take the time to restore.


a whole lot of yuk under that cooktop


Detail of Mies table gray Formica. Also used in the downstairs bathroom cabinet.


Recently, I got my hands on a 1950's "Frigidaire Flair" stove and pull out cook top bought on Craigslist for fifty dollars. See picture below:
I'll use it for parts to restore the pull down cook top. Many of the units her at Lafayette Park folks still have the original unit, they love them.


Dismantling the Place

Now that the hardest work is done I can move onto the first and second floor. My plan is to dismantle and restore everything I can, like the fans in the bathrooms and kitchen, they are original and from the 50's,  Aaron from Mc Chesney electric has been rebuilding them for me. Hes great and has taken the time to make them like new. The medicine cabinets have been removed, the trim is stainless and in great condition, I'll remove and have the cabinets powder coated white. The glass shelves are that beautiful wavy textured green glass you don't see anymore. I just had to clean them and wrap until the cabinets are restored.

 I removed all the register covers,  then sand blasted, primed and painted them a semi gloss black.


 Removing the doors was a challenge because I was worried I would strip the screw heads, only broke one that I'll have to drill out. Brought all the hinges home still working on getting the paint off and either going to polish or consider re-plating. I saw a picture that someone took of their hinges re-plated, they looked great!


Besides the recessed lighting throughout, there is only one ceiling light in the downstairs bathroom. It's all plaster, so it might be hard to install overhead lighting. In the fixture in the downstairs bathroom the trim ring was painted over, it looked like it had a plastic piece over the bulbs. Later I found it was glass, just had never been cleaned. Nice ribbed glass, hard to find these days stripped the paint from the trim ring found it to be stainless. More than anything when I refurbish a home it's the uncovering I find so enjoyable. My other home is 1917, completely different aesthetic, but I found the experience of uncovering and re-new gratifying. 


Finally Stripped and Painted

Well the big job and mess are finally over! The staircase and railing are painted.
 After all the spray paint I ended up painting with a really good enamel primer and paint. The spray paint actually never would cover completely, I would have had to go through about 100 cans and surely would have asphyxiated my neighbors. I had to repaint the basement wall going up to the first floor due to over spray.
I'm going to keep the wooden planks covered with paper until I'm done with all the plaster and painting still left to do.
The staircase is done,  I'm happy with the end result.  Now to the first floor. More to come..............

I ended up deciding on black paint for the staircase and railing with golden oak stained steps. I won't stain and oil until the very end, so for now I'll keep them wrapped in paper.
 Once the walls are primed and painted these stairs will look like a work of sculpture, they already are. When I first saw the place the stairs could have sold it alone.
There is an interesting article the New York Times see link:
www.nytimes.com/Lafayette_Park
Also, be sure to listen to the audios that go with each profile. The images were helpful to me to see how differently people  addressed the staircases through the years.

stairs to second floor
basement stairs

The Steel Staircase and Wooden Planks


The decision to restore the staircase was a no brain er, but what color was really difficult for me. I bounced this off of many. After discussing with my brother John I decided to remove the wooden baby bumpers attached to the railing. Now that it is painted and restored to the original I still liked the bumpers, but glad I removed mine. I had to destroy them in the process, but left the original screw holes in case I decide to reinstall.


I also decided to remove the paint, no easy chore. Using many different products,  highly toxic, I preferred the orange citrus non toxic brand. Even my heat gun would not remove the many coats of paint. After removing all the paint I saw that black was the original color, which helped me make my final decision. The whole stair case is really a piece of sculpture! 

Stripping took weeks for me to complete. The wooden plank steps also had to be removed and sanded.  Just getting the screws out was an all day job for me. Luckily, I had the use of CCS's wood shop making at least the sanding a bit easier.  Once I was able to remove the steps, I discovered that at one point there was pink carpeting on the stairs. Pink carpet to go with the pink walls, all the walls both upstairs and down were painted pink. I found this when I removed the switch covers.


                    risers without the wooden planks, 1/8th in steel


uncovering the original paint.
still stripping.........